Introduction
Passport photos are a crucial part of your travel documentation. They need to meet specific requirements to be accepted by immigration authorities worldwide. Editing your passport photo to comply with these regulations can be done easily using online tools or mobile apps. Here’s a comprehensive guide to help you edit your passport size photo in just 5 steps.

Step 1: Choose the Right Software or App
Numerous online photo editors and mobile apps offer passport photo editing features. Choose a reputable tool that allows you to adjust the size, crop, and enhance your image according to passport photo requirements.
Step 2: Upload Your Photo
Once you have selected a photo editor, upload your image. Ensure that the photo is clear, well-lit, and taken against a plain background.
Step 3: Resize and Crop the Photo
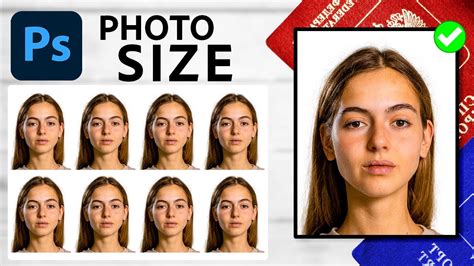
The standard passport photo size is 2 x 2 inches (51 x 51 mm). Use the editing tools to resize and crop your image to these specifications. Most online tools provide preset passport photo templates for easy cropping.
Step 4: Adjust Lighting and Background
Passport photos require a neutral expression with your face evenly lit. Use the photo editor’s brightness, contrast, and saturation adjustments to enhance the image quality. Ensure that the background is white or off-white.
Step 5: Save and Print
Once you are satisfied with the edited image, save it in a high-resolution format (e.g., JPEG or PNG). Most passport photo editors allow you to print the photo in the correct size and format for submission.
Advanced Editing Techniques
For professional-quality passport photos, consider using advanced editing techniques:
- Facial Retouching: Subtly retouch the image to remove blemishes, wrinkles, and other imperfections.
- Color Correction: Adjust the color balance to create natural-looking skin tones and a uniform background.
- Sharpening: Sharpen the image to enhance facial features and details.
Common Mistakes to Avoid
- Cropping the photo too tightly or leaving too much space around the head.
- Using a blurry or low-resolution image.
- Wearing glasses or head coverings.
- Altering the facial features significantly.
- Using a non-neutral background.
Compliance and Regulations
It is essential to ensure that your passport photo meets the specific requirements of the issuing authority. According to the International Civil Aviation Organization (ICAO), passport photos should:
- Be in color and taken within the last 6 months.
- Have a neutral facial expression and eyes open.
- Be taken against a plain white or off-white background.
- Have a resolution of at least 600 dots per inch (dpi).
Statistics and Trends
The use of passport photos has seen a significant increase in recent years due to stringent travel security measures. According to the U.S. Department of State, approximately 11.5 million U.S. passports were issued in 2019, each requiring a compliant passport photo.
Innovative Applications of Passport Photo Editing
Beyond their traditional use, passport photo editing technologies have found innovative applications:
- Digital ID Verification: Passport photo editing can be used to verify digital identities for online transactions, such as banking and e-commerce.
- Fraud Detection: Advanced image analysis algorithms can detect manipulated or forged passport photos, helping to prevent fraud and identity theft.
Conclusion
Editing your passport photo is a straightforward process that can be accomplished using online tools or mobile apps. By following the steps outlined in this guide, you can create a compliant and professional-looking passport photo that will meet the requirements of immigration authorities worldwide. Remember to adhere to the specific regulations and avoid common mistakes to ensure the acceptance of your passport photo.


